

A shower can look flawless on day one and still be one slow leak away from a costly teardown. The tricky part is that most shower failures don’t announce themselves with a puddle – they show up as a soft baseboard, a faint musty smell, or grout that keeps darkening after it “dries.” By the time you see the damage, the framing and subfloor may already be involved.
When homeowners in the Meridian-Boise-Nampa area ask what really makes a shower last, the answer is almost never the tile. It’s the waterproofing behind it. Tile and grout manage water on the surface. Waterproofing manages the water that gets past the surface, because some always does.
What waterproofing is (and what it isn’t)
Waterproofing is a continuous barrier that directs water back into the drain system without letting it soak into drywall, cement board, studs, or the subfloor. A “water-resistant” backer board is not the same thing. Cement board won’t disintegrate like drywall, but it can still absorb moisture and hold it against wood framing.
The goal is simple: create a complete, sealed system – pan, walls, corners, penetrations, transitions – so water has only one path: down the drain.
The big decision: traditional pan vs surface waterproofing
Most shower waterproofing methods fall into two categories. One is a traditional shower pan with a liner buried under the mortar bed. The other is a surface-applied system where the waterproof layer is directly behind the tile.
Traditional systems have been around a long time and can work well when built perfectly. Surface waterproofing has become the standard for many high-end tile showers because it dries faster, is easier to inspect during installation, and tends to reduce long-term moisture buildup.
Neither is “always best.” Your shower size, drain location, desired tile, and even how you use the shower all affect what makes sense.
Shower waterproofing methods you’ll see in real remodels
Traditional PVC or CPE liner with a clamping drain
This is the classic method in many older homes. A pre-slope is formed on the subfloor, then a flexible liner is installed and wrapped up the walls and over the curb. A second mortar bed sits on top, and tile is installed above that.
When it’s done right, it can be durable. The trade-off is that the mortar bed stays damp more often, because the waterproofing is below it. That can contribute to slower drying and, in some cases, odor or discoloration in grout.
It also has a few common failure points. If the pre-slope is skipped, water can sit in the mud bed. If the liner is cut or fastened in the wrong place, leaks can show up at the curb and corners. And the weep holes at the drain must stay clear, or water won’t drain properly from the pan assembly.
This method is often chosen when a contractor is matching an existing setup, working with certain drain types, or doing a straightforward shower replacement with familiar details.
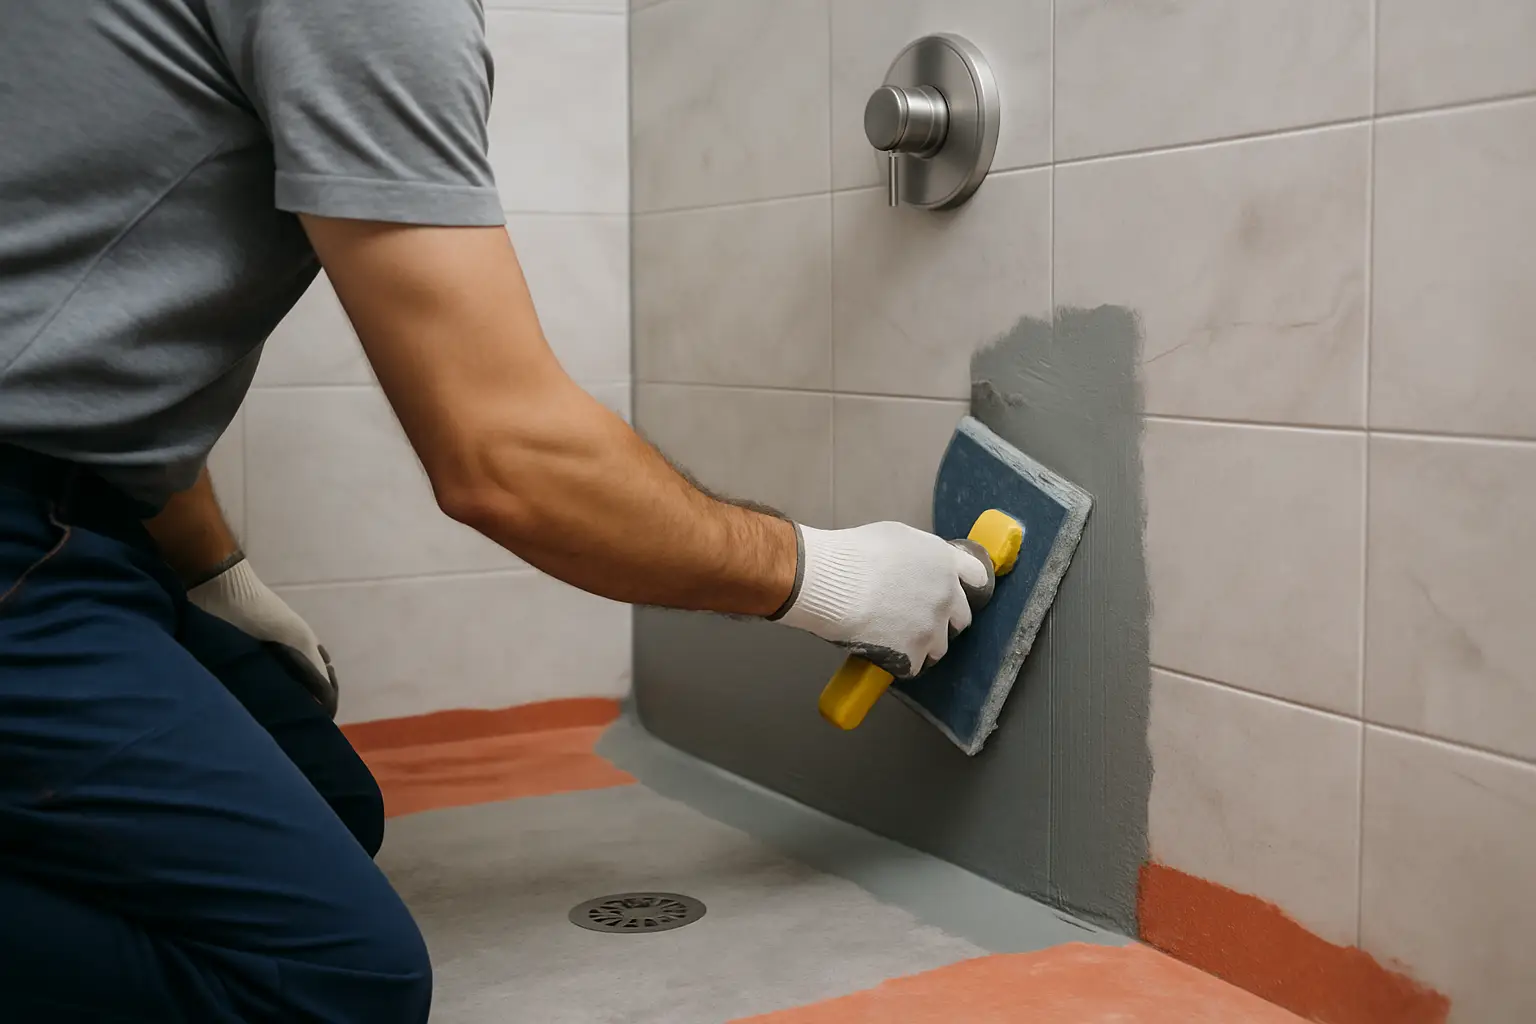
Liquid-applied membrane (paint-on waterproofing)
Liquid membranes are rolled, brushed, or troweled onto approved backer board and shower pans. Once cured, they form a continuous waterproof layer right under the tile. This is one of the most flexible shower waterproofing methods because it works on walls, niches, benches, and other custom features without a lot of seams.
The advantage is that it creates surface waterproofing and lets the shower dry out faster between uses. It’s also easier to integrate into unusual shapes.
The trade-off is that installation quality matters a lot. Too thin and you get weak spots. Miss a corner or penetration and the system is only “mostly waterproof,” which is the same as not waterproof. Cure times and required mil thickness should be followed exactly, and reinforcement fabric is often needed at transitions.
Liquid membranes are a strong choice for custom tile showers, especially when you want niches, shelves, or multiple planes that would be awkward to wrap with a sheet.
Sheet membrane systems (surface-applied sheets)
Sheet membranes are thin waterproof sheets installed with thinset mortar, then sealed at seams and corners with overlaps or banding. This is a common approach for premium showers because the waterproofing is consistent in thickness and can be tested visually as the work progresses.
The main advantage is predictability. If the seams are properly overlapped and corners are properly treated, you get a very reliable barrier directly behind the tile. It also pairs well with prefabricated foam shower trays and curb systems.
The trade-off is that details are everything. Seams, inside corners, outside corners, and valve penetrations must be handled correctly. It’s also not the fastest method if the layout is complicated, because sheet goods require careful fitting and clean substrate prep.
For many homeowners who want a long-lasting tile shower with a clean, modern finish, sheet membranes are often the “done-right” option.
Foam shower pans and integrated curb systems
Foam pans are pre-sloped, lightweight shower bases designed to be waterproofed as part of a system (usually with sheet membrane, sometimes with liquid). They can reduce build time and eliminate some of the variables that come with hand-packing a mortar bed.
The advantage is slope accuracy and speed, especially in standard-size showers. The trade-off is that the subfloor must be flat and stiff enough to support it, and the pan must be sized to the shower layout. If your shower is oversized, has an unusual drain location, or needs a barrier-free entry, a custom mud pan may still be the better fit.
Cement board plus vapor barrier behind (the “behind-the-board” approach)
In this method, a plastic sheet or roofing felt is stapled to studs, then cement board is installed over it. Water that gets through the cement board is intended to run down the barrier into the pan.
It’s a recognized approach in some assemblies, but it’s not the best match for today’s feature-heavy showers. Niches, benches, and plumbing penetrations make continuity difficult, and you still end up with a wall system that can hold moisture.
If you’re investing in a high-end remodel, this is usually the point where spending a little more on a surface-applied system pays you back in peace of mind.
The details that decide whether a shower leaks
Even the best products fail when key transitions are handled casually. Most shower leaks happen at the same few locations.
Corners and changes of plane are first. Any time a wall meets another wall, or a wall meets the floor, the waterproofing must stay continuous and reinforced. This is where shortcuts show up later.
Curb construction is another common culprit. Curbs take direct water, foot traffic, and movement. A traditional liner should never be punctured on the inside or top of the curb, and surface systems need proper wrapping and sealing.
Penetrations – valves, shower heads, body sprays, and door fasteners – also matter. A waterproofed wall is only as good as its seals around openings.
Niches and benches look great, but they’re “water features” from a waterproofing perspective. They need slope, consistent coverage, and careful seam work so water can’t sit.
How to choose the right method for your bathroom
If you’re selecting between shower waterproofing methods, start with how the shower will be used and what you’re building.
If you’re doing a simple tub-to-shower conversion with a standard footprint and you want a long-lasting tile finish, a surface-applied system (sheet or liquid) is typically the cleanest way to control water and keep the assembly drying properly.
If you’re building a custom mud pan for a larger shower, want a linear drain, or need a specific slope strategy, you can still use surface waterproofing on top of a mud bed and get excellent results.
If budget is a major constraint and the shower is straightforward, a traditional liner can still perform well, but it requires disciplined workmanship – pre-slope, protected weep holes, correct curb treatment, and proper wall integration.
And if you’re considering a “quick refresh” where you keep the existing tile or pan, be cautious. Waterproofing is not a coating you can reliably add after the fact without opening the assembly. In many cases, a true fix means rebuilding the shower system, not just regrouting.
What homeowners should ask before work starts
A contractor doesn’t need to overwhelm you with brand names or code citations to prove they know what they’re doing. Clear answers to practical questions tell you a lot.
Ask what waterproofing system will be used and where the waterproof layer will sit – under the mortar bed or directly behind the tile. Ask how corners, curbs, and niches will be handled. Ask whether the shower will be flood tested (when applicable) before tile goes in. And ask who is responsible for permits and inspections if the project involves plumbing changes.
If you want a team that manages the full scope and treats the waterproofing phase with the same precision as the tile layout, that’s exactly how we approach bathroom builds at My Contractor LLC.
The craftsmanship standard that pays off years later
A shower that “looks good” can still be built in a way that traps moisture, stresses corners, or lets water migrate into framing. The difference between a shower that lasts five years and one that lasts twenty is rarely visible in the final photos.
When you plan your remodel, aim for a system you can trust, installed with patience and consistency. The best feeling isn’t just stepping into a beautiful shower – it’s knowing you won’t be opening the walls again because someone rushed the part you can’t see.