

A tile shower can look timeless for years, or it can start showing cracks, loose grout, and water damage far sooner than expected. The difference usually comes down to the steps behind the finish. That is why a clear tile shower installation process guide matters. Homeowners often focus on tile color, pattern, and fixtures, but the real performance of a shower is built long before the first tile is set.
In homes across Meridian, Boise, and Nampa, shower remodels are often driven by the same issues: aging fiberglass surrounds, dated finishes, soft subfloors, poor waterproofing, or a layout that never worked well in the first place. A properly built tile shower fixes more than appearance. It improves daily use, protects the home from moisture problems, and adds long-term value when the work is done with precision.
Why the tile shower installation process guide matters
Tile is not the waterproof layer. That is one of the biggest misconceptions homeowners run into. Tile and grout are the visible finish, but the real job of keeping water out belongs to the shower pan, the waterproofing system, the drain integration, and the way each transition is built.
That is why shower installation is less about speed and more about sequence. If the framing is out of square, the walls are not properly prepared, or the waterproofing is rushed, the final result may still look good for a short time. The trouble shows up later, often behind the surface, where repairs become expensive and disruptive.
A good installer thinks beyond the tile face. They are checking slope, flatness, movement, drain location, curb construction, and how the shower meets nearby flooring, drywall, glass, and plumbing trim. That craftsmanship-first approach is what separates a durable shower from one that only photographs well on day one.
Planning before the first demolition cut
Every successful shower starts with planning. This includes measuring the space, confirming whether the existing layout stays the same, and deciding if plumbing needs to move. It also means choosing the type of shower base, wall tile size, niche placement, fixture height, and glass configuration before work begins.
This stage matters because tile layout is not just a design decision. Large-format tile may reduce grout lines, but it also demands flatter walls. Mosaic tile works well on sloped shower floors, but it changes the maintenance profile and visual texture. A curbless shower can look clean and modern, but it may require more floor prep and more careful drainage planning than a standard curb design.
For many homeowners, this is where guidance matters most. A contractor who understands both remodeling and finish work can help avoid choices that look good in a showroom but create unnecessary complications in a real bathroom.
Demolition and structural inspection
Once the design and scope are set, the old shower comes out. Demolition should be controlled, not careless. The goal is to remove the existing surround, tile, pan, backer, and any damaged materials without creating more repair work than necessary.
At this point, the wall framing and subfloor are exposed. This is where hidden problems often appear. Water damage, mold, poorly done past repairs, or framing that was never square can all affect the next phase. If the studs are bowed or the floor is soft, those issues need to be corrected before the new shower is built.
This is also the right time to confirm plumbing condition and drain location. Reusing old plumbing may sound efficient, but it depends on the age and condition of the existing system. Sometimes keeping it makes sense. Other times, replacing components while the walls are open is the better long-term decision.
Building the foundation of the shower
A tile shower needs a stable, properly prepared base. That starts with framing and substrate work. Walls may need to be sistered, shimmed, or planed so the tile sits flat. Corners need to be true enough to support a clean installation. The subfloor must be solid and capable of supporting the chosen assembly.
From there, the shower pan system is built. There are different methods, including traditional mud pans and modern waterproof shower systems. The right choice depends on project goals, budget, schedule, and installer experience. What does not change is the need for correct slope toward the drain and proper integration between the floor, walls, curb, and drain body.
No part of this step should be improvised. Small errors in slope or waterproof transitions can lead to standing water, slow drainage, or moisture intrusion. Those are not cosmetic problems. They affect how the shower performs every day.
Waterproofing is the real make-or-break step
If there is one part of the tile shower installation process guide that deserves extra attention, it is waterproofing. This is where long-term performance is won or lost.
A properly waterproofed shower includes the full wet area, not just the floor. Walls, corners, seams, niches, benches, curbs, and fastener penetrations all need to be treated according to the chosen system. The materials may vary, but the standard should not. The shower must function as a complete waterproof assembly.
Flood testing is one of the smartest quality-control steps in the process. It gives the installer a chance to confirm that the pan holds water before tile covers the work. Homeowners may never see this stage, but it is one of the clearest signs that the job is being done with care instead of shortcuts.
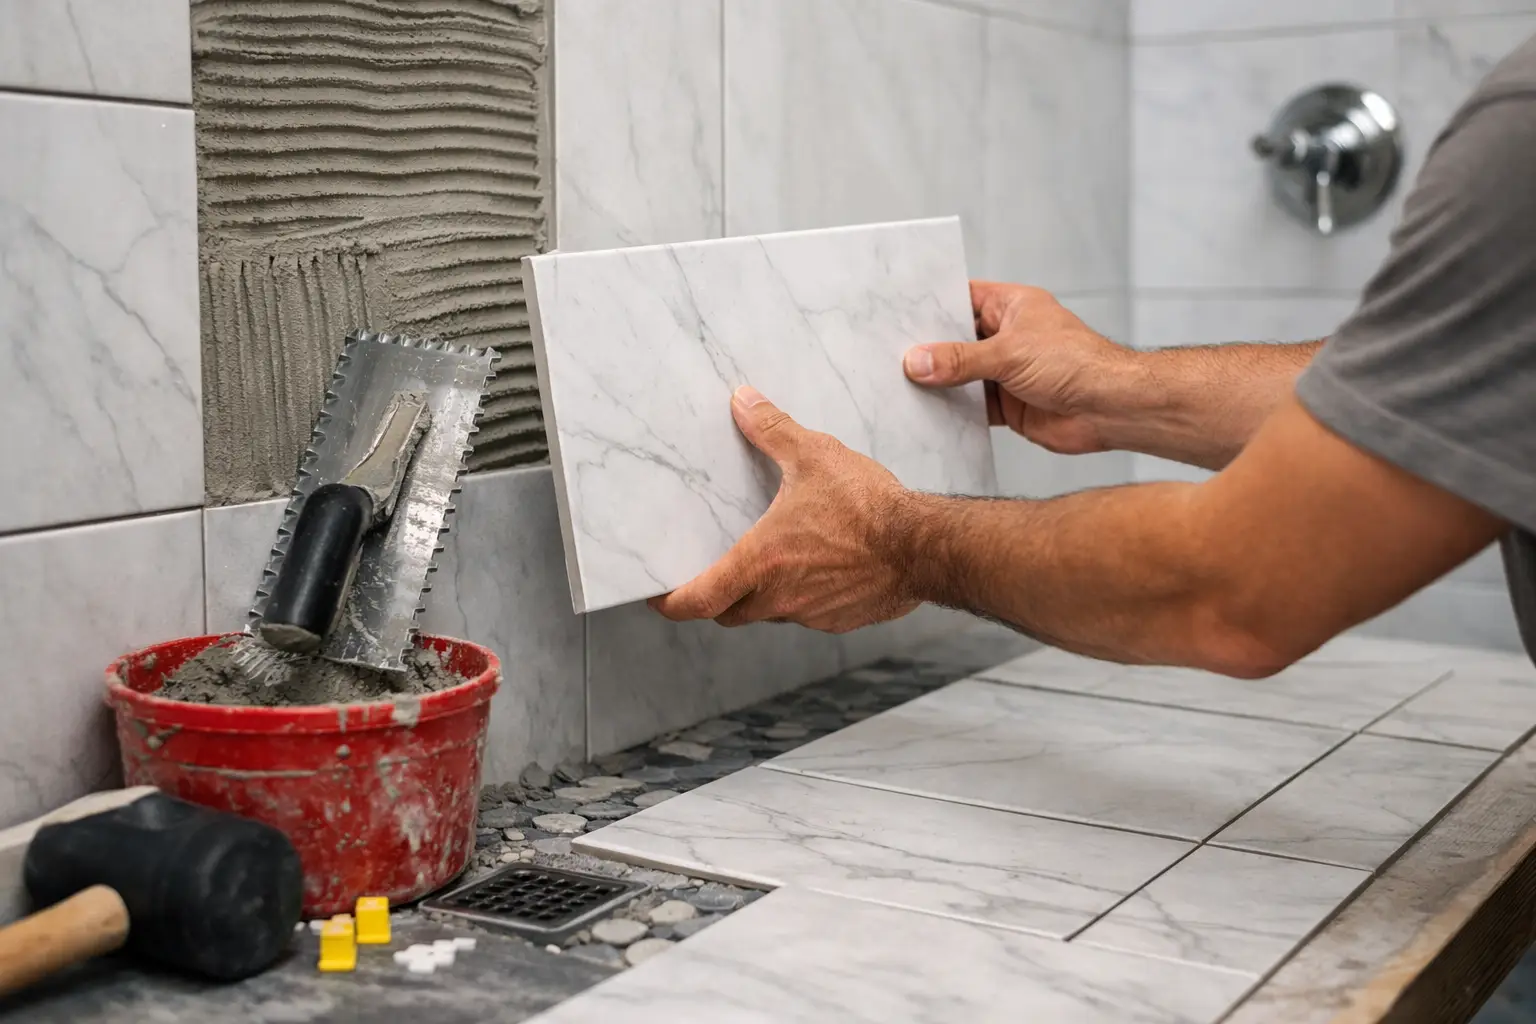
Tile layout and setting
Once the shower is waterproofed and ready, layout begins. This is where the shower starts to look real, but it is still a technical stage. Good layout determines where cuts land, how patterns line up, how niches center with grout joints, and whether the installation looks balanced from the bathroom entry.
This is also where experience shows. A detail-oriented installer will think through focal lines, plumbing penetrations, edge treatment, and transitions before spreading mortar. They are not just setting tile. They are composing the finished space.
Tile is then installed using the appropriate mortar and setting method for the material and location. Coverage matters. Alignment matters. Joint consistency matters. With larger tile in particular, lippage control and wall flatness become critical. The finished result should look intentional from every angle, not close enough.
Grouting, sealing, and finishing details
After the tile sets properly, the joints are grouted and movement joints are treated where needed. This is not the place to blur materials together. Changes of plane often require flexible sealant rather than grout, because showers move slightly over time. Using the wrong material in the wrong place can lead to cracking.
Depending on the tile and grout selected, sealing may also be part of the process. Some surfaces need it, some do not. That depends on the product, not on habit. This is another area where homeowners benefit from direct, honest guidance instead of one-size-fits-all advice.
Then come the finishing details: trim installation, drain cover alignment, fixture trim, glass prep, cleanup, and final inspection. These are the moments people notice every day. Uneven cuts around the valve, sloppy caulk lines, or out-of-place trim can undermine an otherwise solid build. Precision matters all the way to the end.
Permits, inspections, and code considerations
Not every shower remodel has the same permitting requirements, especially if plumbing, electrical, ventilation, or structural work is involved. That is why code compliance should be addressed early, not after demolition starts.
For homeowners, this part can feel like the least exciting piece of the project, but it protects the investment. Proper permits and inspections help ensure that concealed work meets current standards. They also reduce risk when selling the home later. A contractor who manages this process well saves clients time, confusion, and avoidable setbacks.
What can affect timeline and cost
Most homeowners want to know how long a tile shower takes and why estimates can vary so much. The answer depends on scope. A straightforward replacement in the same footprint is very different from a full reconfiguration with plumbing moves, custom niches, upgraded fixtures, or structural repairs.
Material choice also affects both price and schedule. Natural stone, handmade tile, large-format porcelain, and detailed patterns require different levels of prep and installation time. Even glass selection and hardware lead times can influence the project calendar.
The key is not finding the fastest path. It is finding the right sequence with realistic expectations. A shower built carefully takes longer than one rushed through, but it is far less likely to need premature repair.
Choosing the right contractor for the job
A tile shower is one of those projects where general remodeling knowledge and finish-level skill both matter. You want someone who understands demolition, framing, plumbing coordination, waterproofing, tile setting, and final detailing as one connected system.
That is why homeowners should ask practical questions. Who handles permits and inspections if they are required? How is waterproofing done? What happens if damage is found behind the old shower? How are layout decisions made before tile starts? Clear answers usually signal a clear process.
For local homeowners who want a done-right result, that process should feel organized from the first walkthrough to the final cleanup. Companies like My Contractor LLC build trust by pairing project management with craftsmanship, which is exactly what a tile shower demands.
A well-built shower should feel solid, drain properly, clean up easily, and still look sharp years from now. That kind of result does not happen by accident. It comes from a team that respects the process as much as the finish.