

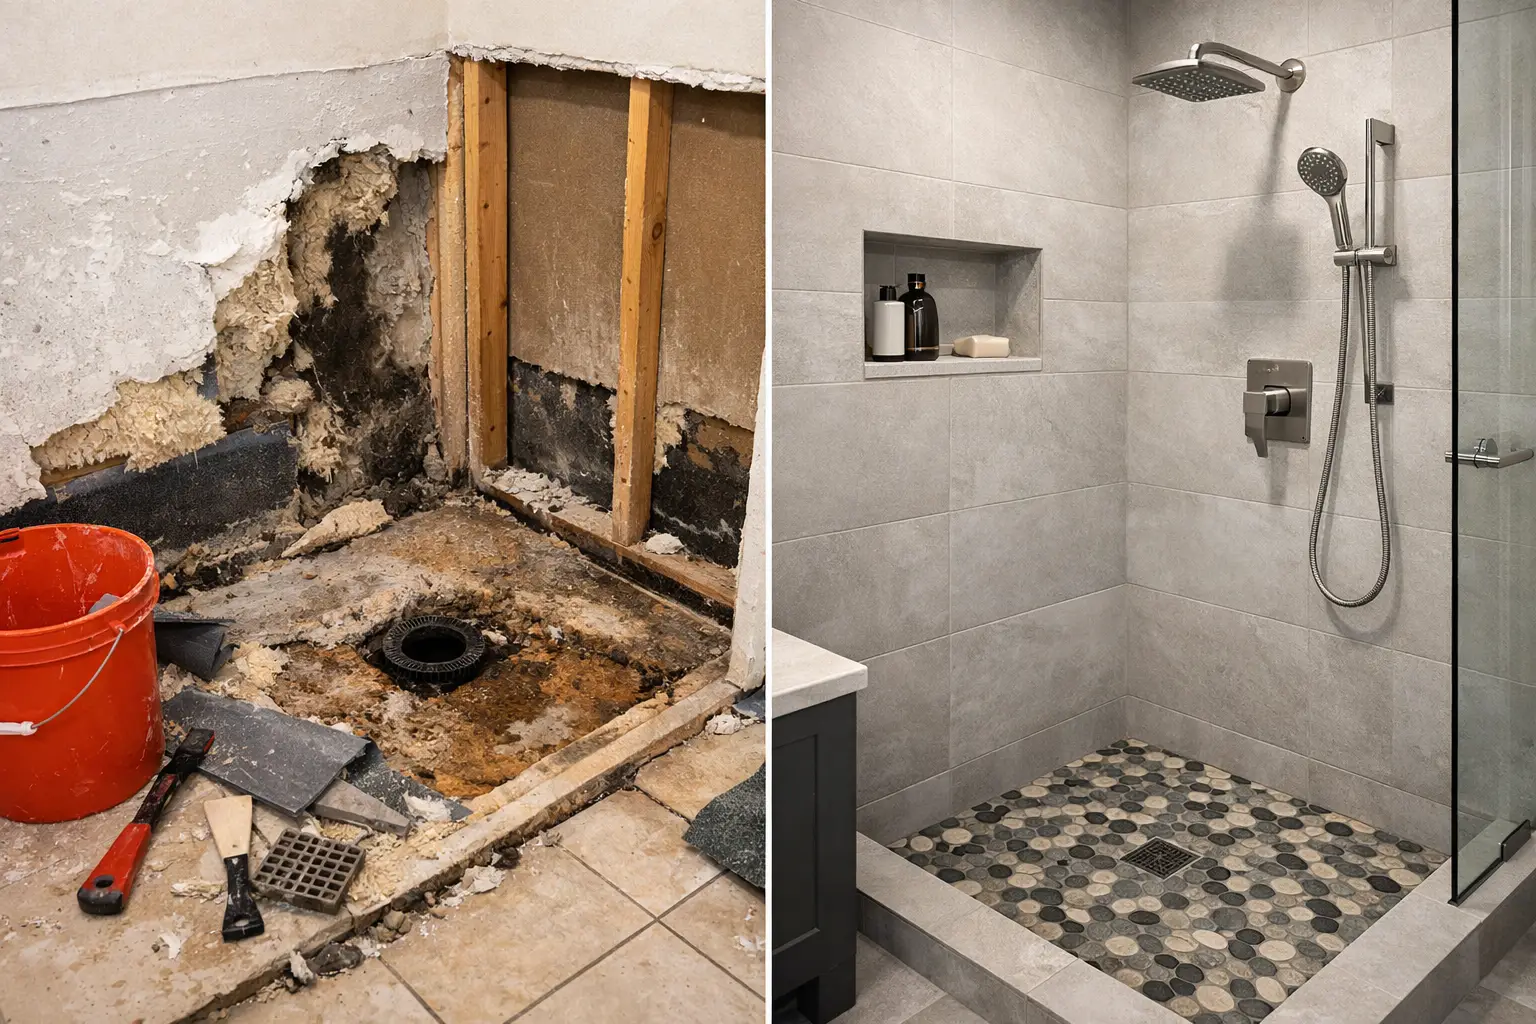
A shower can look clean, solid, and recently tiled while water is quietly damaging the structure behind it. This tile shower rebuild after leak case study follows a representative repair scenario common in Meridian, Boise, and Nampa homes: a small outside-the-shower clue led to a full investigation, targeted demolition, and a properly waterproofed rebuild.
The homeowner did not call because tile was falling off the wall. They called because the baseboard on the other side of the shower wall had begun to swell. The bathroom itself showed only minor warning signs: darkened grout in one corner, a faint musty smell after long showers, and caulk that had separated where the shower floor met the wall.
Those details mattered. A tile shower is not waterproof simply because it has tile, grout, and caulk. Those materials create the finished surface. The protection that keeps framing and subfloor dry must be built behind and beneath them.
The first clue was outside the shower
The affected shower was a tiled walk-in design with a glass enclosure, a corner bench, and a curb at the entry. The homeowner had noticed the damaged baseboard in the adjacent bedroom and initially suspected a plumbing leak. That was a reasonable concern, but it was only one possibility.
A careful assessment starts by separating a supply or drain leak from a shower-system failure. Plumbing leaks can occur even when the shower is not in use. Waterproofing failures usually show their pattern after repeated shower use, particularly around corners, penetrations, benches, curbs, and the drain connection.
In this case, moisture readings were elevated along the shared wall and at the shower entry. The shower valve and supply plumbing showed no active leak. The drain connection also appeared sound. The evidence pointed instead to water escaping through failed transitions at the lower wall and curb area.
This distinction affects the scope of work. Repairing a pipe may require limited wall access. A failed shower pan or improperly waterproofed bench can require removing the finished shower so the entire water-management system can be rebuilt correctly.
Why surface repairs were not enough
The homeowner understandably asked whether the problem could be solved by replacing the cracked grout and applying new caulk. Fresh caulk was part of the final rebuild, but it was not a repair for the underlying failure.
Grout is not a waterproof membrane. Even well-installed grout can absorb some moisture, and hairline cracking can occur as a home moves or materials expand and contract. Caulk is designed for movement joints, but it cannot compensate for missing waterproofing behind the tile or a shower floor that does not direct water to the drain.
Once water has reached the wallboard, framing, or subfloor, covering the surface may hide the symptoms while the damage continues. In a shower, that can lead to deteriorated drywall, mold growth, loose tile, damaged insulation, and eventually repairs beyond the bathroom itself.
The recommendation was a full shower rebuild rather than a cosmetic patch. That decision added cost and time compared with a surface refresh, but it protected the home from repeat damage and gave the homeowner a finished shower backed by a sound installation process.
Demolition revealed the real extent of the leak
Demolition is where assumptions are tested. The work area was contained, and the existing glass, tile, shower base, and damaged wall materials were removed in a controlled sequence. Protecting nearby flooring and keeping demolition debris contained are practical details that make a major bathroom repair easier to live through.
Behind the lower wall tile, moisture damage was visible in the wallboard near the shower floor. The bench framing showed signs of repeated exposure, and the subfloor near the curb was damp. The framing itself was still structurally serviceable after drying and treatment, which prevented the project from expanding into a larger structural repair.
That is not always the outcome. If framing is soft, significantly warped, or affected by extensive microbial growth, it may need replacement. If water has migrated into an adjoining room, flooring, trim, drywall, or insulation can also be part of the repair scope. Every leak has its own path, which is why a contractor should avoid promising a final repair scope before the shower is opened.
With damaged materials removed, the area was dried, cleaned, and prepared for reconstruction. The goal was not simply to make the shower look new. The goal was to create a system that manages water correctly from the tile surface to the drain.
Rebuilding the shower from the structure outward
A dependable tiled shower is built in layers. Each layer has a job, and each transition must connect to the next one correctly.
First, the framing was checked for plumb, level, and square. This step is easy to overlook, yet it affects everything that follows. Walls that are out of plane can create uneven tile lines, difficult glass installation, and weak points at corners. The bench was also rebuilt with the proper slope so water would not sit on its horizontal surface.
Next came the shower floor. The substrate was shaped to slope consistently toward the drain. A shower floor should not rely on grout joints to find its way downhill. The waterproofing assembly and finished floor both need a clear path for water to reach the drain without pooling at the perimeter or near the bench.
A bonded waterproof membrane was then installed across the shower floor and walls, with special attention to corners, seams, the curb, bench, niches, and plumbing penetrations. These are the areas where workmanship matters most. Large wall surfaces are straightforward. Transitions are where water finds an opening when materials are rushed, overlapped incorrectly, or left without proper reinforcement.
Before tile installation, the waterproofed shower was flood tested. The drain was temporarily plugged, the shower base was filled to a controlled level, and the assembly was monitored for loss of water or signs of moisture outside the enclosure. A flood test takes time, but it is far less costly than discovering a failure after tile, glass, and fixtures are in place.
Tile selection had to balance appearance and maintenance
The homeowner wanted a lighter, more current bathroom without creating a shower that would be difficult to maintain. The final design used large-format wall tile to reduce grout lines and a smaller textured mosaic on the shower floor for traction and slope flexibility.
Large tile can create a clean, high-end appearance, but it demands flat walls and precise layout. Smaller floor tile works well around a drain and on sloped surfaces, though it has more grout joints to clean. Neither choice is universally better. The right selection depends on the shower size, drain location, desired look, cleaning preferences, and the condition of the structure below.
The tile layout was planned before setting began. That included centering focal walls, avoiding narrow tile slivers at visible edges, aligning niche and accent details, and confirming that the curb and glass enclosure would work with the finished dimensions. Precision at this stage is what makes a bathroom feel intentional rather than merely updated.
After the tile was installed and cured, grout and flexible sealant were applied in their proper locations. Changes of plane, such as wall-to-wall corners and wall-to-floor transitions, received flexible sealant rather than rigid grout. The final glass enclosure and fixtures were installed only after the tile system was complete.
What this tile shower rebuild after leak case study teaches
The visible leak was small, but the repair required a full-system view. The homeowner avoided a cycle of repeated caulk repairs because the work addressed the real issue: water had bypassed the finished surface and reached materials that were never meant to get wet.
There are several practical signs homeowners should take seriously. A musty odor, loose or cracked caulk, stained ceilings below a bathroom, swelling baseboards, soft flooring near a shower, recurring grout problems, or tile that sounds hollow can all justify a professional evaluation. None automatically means a complete rebuild is required, but delaying an inspection can make a manageable repair more expensive.
A well-managed shower rebuild also benefits from clear sequencing. Demolition, drying, framing corrections, plumbing adjustments, waterproofing, testing, tile installation, and final fixtures must happen in the right order. Permits and inspections may be needed when plumbing or structural work is involved. A licensed contractor can coordinate those details so the homeowner is not left managing separate trades or guessing whether an unseen layer was completed correctly.
For homeowners who want the confidence of start-to-finish oversight, My Contractor LLC approaches bathroom work with the same attention given to the finish tile and the construction behind it. The details hidden under the surface are what protect the investment above it.
If your shower has started leaving clues outside the enclosure, treat them as an opportunity to investigate early. The right repair is not always the smallest repair, but it should always be the one that leaves your home dry, your shower dependable, and the finished work worth seeing every day.